Most tutorials on how to install drip irrigation skip the part where your dog treats half-inch tubing like a rawhide bone. Or the moment your cat unearths a bubbler just to watch water pool. If you’re reading this, you’ve probably already repaired a chewed line or wondered whether that black plastic is actually safe for pets to mouth.
Here’s the good news: a pet-safe drip system isn’t that much harder to plan. You just need the right components, a layout that avoids high-traffic digging zones, and a few cheap tricks to protect emitters. I’ll walk you through the full process—step by step, from faucet to last dripper—so you water your garden, not your vet bills.
📌 Getting Started with Pet-Safe Drip Irrigation
Drip irrigation is the most efficient way to water garden beds, containers, and pet areas. It delivers water slowly at the root zone, so less is lost to wind, evaporation, and runoff. That means lower water bills and fewer soggy patches where pets like to dig.
Pet safety starts with how you lay the system. Dogs and cats often chew exposed tubing, dig around buried emitters, or drink from puddles left by leaky fittings. The three biggest risks are:
- Chewing: Soft or scented tubing can look like a chew toy.
- Digging: Damp soil around emitters attracts digging behavior.
- Water access: Leaks create standing water, which can harbor bacteria or attract wildlife.
Standard irrigation parts aren’t always tested for drinking-water contact. Some cheap tubing contains recycled PVC, phthalates, or leaded brass fittings. Pet-safe components use food-grade or NSF/ANSI 61-certified polyethylene, silicone, or stainless steel.
When buying tubing and emitters, look for these markers:
- Phthalate-free and BPA-free polyethylene or polyurethane tubing
- Non-toxic, UV-stabilized plastic emitters, preferably silicone or acetal
- Lead-free or stainless steel fittings instead of brass
- Thicker wall tubing (0.6–1.0 mm) that resists teeth and claws
Bury main lines 2–4 inches deep and cover emitter lines with mulch or protective conduit to reduce chewing and digging triggers.
📌 Tools and Materials for a Pet-Safe Drip Irrigation System
You don’t need a plumbing background, but you do need the right parts on hand before you cut any tubing. A missing pressure regulator or backflow preventer can make the system unsafe—especially for a yard where pets drink from puddles or lick drippers.
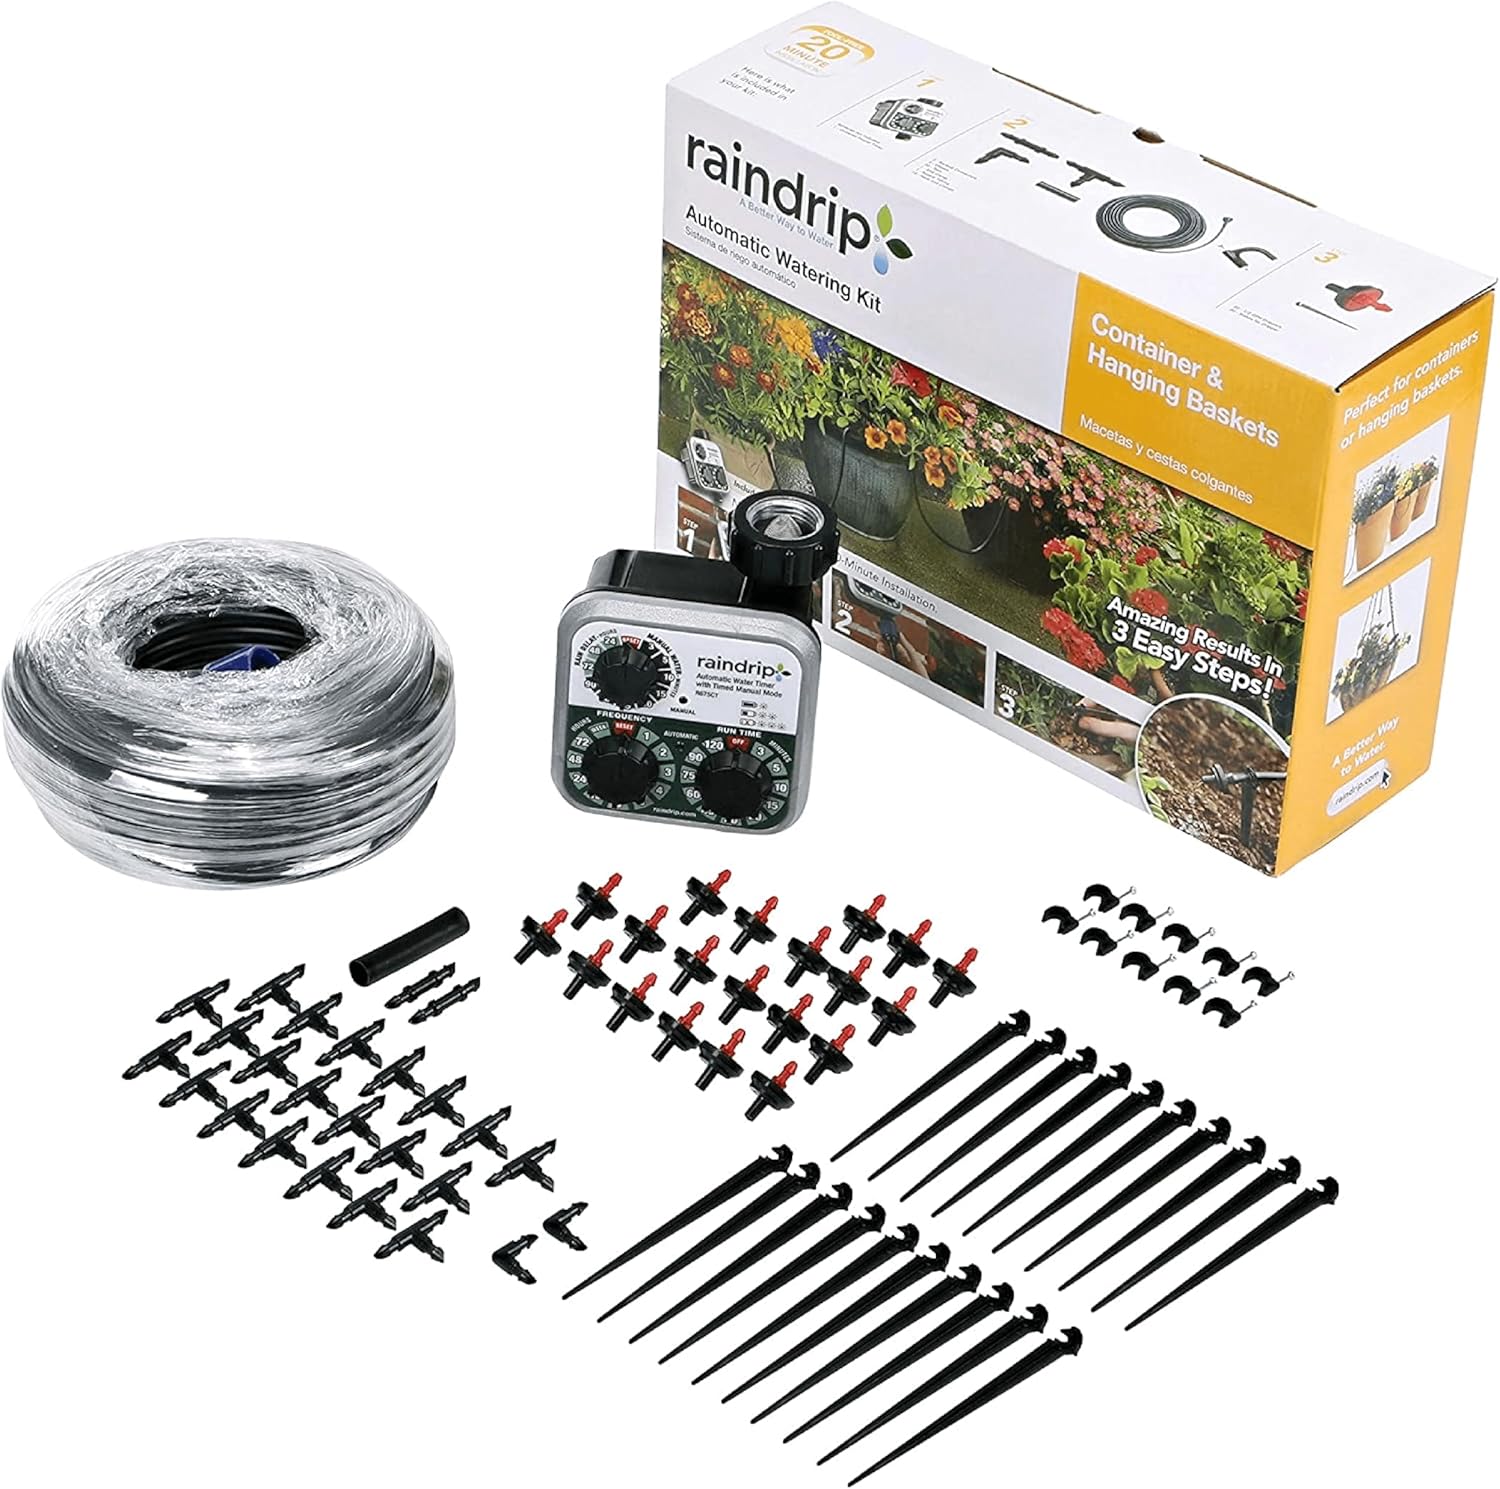
- Tubing cutter – makes clean, square cuts on 1/2-inch and 1/4-inch polyethylene tubing.
- Hole punch – creates precise ports for emitters and 1/4-inch connectors without tearing the mainline.
- Pressure regulator – most drip systems need 20–25 PSI. Higher pressure blows fittings apart.
- Backflow preventer – keeps irrigation water from flowing back into your household supply.
- Filter – a 150-mesh or finer screen filter stops grit from clogging emitters.
- Emitters – choose 0.5–2 GPH flow rates depending on plant type and soil drainage.
- Connectors – tees, elbows, and barbed fittings for branching lines.
- Stakes – hold tubing and emitters in place above soil or mulch.
For a pet-safe setup, use food-grade or non-toxic polyethylene tubing. Many standard drip lines are fine, but if your dog or cat chews, look for BPA-free and lead-free components. Dark-colored tubing also helps prevent algae growth inside the lines.
Optional protective accessories include buried-line conduit, anti-chew spiral covers, and pet-safe deterrent sprays like bitter apple or citrus formulas. These help if you have a determined chewer.
Before starting, check off this list:
- 1/2-inch mainline tubing and 1/4-inch distribution tubing
- Pressure regulator and backflow preventer
- 150-mesh filter
- Hole punch and tubing cutter
- Emitters, connectors, and stakes
- Optional conduit, anti-chew covers, or deterrent spray
📌 Planning Your Drip Irrigation Layout Around Pet Areas
Start by walking the yard with a notebook or phone camera. Mark the routes your dog already uses—fence lines, the path from patio to gate, shady nap spots, and any craters where digging happens. Those are no-go zones for surface tubing and vulnerable emitters.
Then draw a rough map. Divide it into three layers: garden beds that need regular water, grass or ground cover that can stay drier, and pet-only areas that should stay dry. Keeping pet beds, water bowls, and favorite play corners out of the drip zone reduces mud, chewing, and tripping.
- Emitter placement: Keep drip emitters at least 18 inches away from pet beds, food and water stations, and high-traffic paths. Use adjustable emitters near walkways so you can dial flow down or shut off a line entirely.
- Buried vs. surface lines: In digging or chewing zones, bury 1/2-inch mainline 2–4 inches deep and run it through protective conduit. Keep 1/4-inch feeder lines only in fenced beds or behind barriers.
- Physical separation: Raised beds, low garden fencing, or decorative rock borders work well. They signal to pets that an area is off-limits and keep tubing out of direct paw reach.
If your dog treats a particular bed as a nap spot, move the drip line to the perimeter and use short spaghetti tubing to reach individual plants rather than running lines through the middle. That one change can save you from replacing chewed connectors every month.
📌 Step-by-Step Drip Irrigation Installation: From Faucet to Emitters
Here’s the sequence I use to build a drip system that waters plants evenly and stands up to curious paws. Work from the faucet outward so you can flush debris at each stage.
- Thread on the backflow preventer first, then the filter, then a 25 psi pressure regulator. This order keeps the filter clean and protects emitters from pressure spikes. Use plumber’s tape on every thread.
- Run 1/2-inch mainline tubing from the faucet assembly to the garden edge. Uncoil it in the sun for 20 minutes to soften kinks. Cut with a tubing cutter, and use elbow or tee fittings at corners. Keep the mainline out of obvious digging zones for now.
- Punch holes with a drip punch tool at each plant base. Insert a barbed connector. For individual shrubs, press in a 1/2-gph or 1-gph emitter. For rows of vegetables or annual beds, attach 1/4-inch drip line with inline emitters spaced 6–12 inches apart. Skip micro-sprayers in pet areas—they create puddles that invite digging.
- Secure tubing with stakes every 3–5 feet. Where dogs or cats walk regularly, bury the mainline 2–3 inches deep or cover it with mulch. For exposed sections that a puppy might chew, slip the tubing inside 1/2-inch split loom or PVC conduit.
- Flush before capping the end. Leave the end cap off, turn on the water for two minutes, then cap it. Check every emitter for a slow, steady drip. Tighten leaky connections and watch for misting, which signals too much pressure.
Once it’s running, mark the mainline path with small flags for a week—it helps pets learn where not to dig.
🔑 How to Protect Drip Lines and Emitters from Chewing and Digging
Your dog’s teeth and paws can turn a freshly installed drip system into confetti. Here’s how I protect tubing without making the yard feel like a fortress.
- Bury lines 2–4 inches deep in beds and runs where pets dig. For exposed sections near faucets or patios, slip 1/2-inch PVC conduit or corrugated wire loom over the tubing. It’s cheap insurance against puncture wounds.
- Use pet-safe bitter sprays like Grannick’s Bitter Apple or a homemade apple cider vinegar and citrus mix. Reapply every few weeks or after rain. I’ve found it works best on cool, shaded tubing—hot plastic can bake off the deterrent.
- Add physical barriers where digging is frequent. Lay galvanized wire mesh flat over shallow lines, or set decorative river rocks around emitters. A low 12-inch garden fence keeps determined diggers out of vegetable beds.
- Anchor everything with heavy-duty stakes. Flimsy plastic stakes pop out in seconds. Use 6-inch steel landscape staples for tubing and sturdy plastic emitter stakes with locking tabs. A pulled emitter is a broken emitter.
- Redirect the behavior instead of just punishing it. Give your dog a dedicated digging pit filled with sand and buried toys. Reward calm sniffing near the drip lines, and teach “leave it” around exposed emitters.
One caution: Never use cayenne or hot pepper sprays near the eyes or nose. Even pet-safe bitter sprays can cause drooling, so test a small area first. The goal is to make tubing boring, not painful.
📌 Choosing Pet-Friendly Drip Irrigation Components
The single most important swap is moving from generic vinyl tubing to food-grade polyethylene. I look for 1/2-inch mainline and 1/4-inch distribution lines marked NSF/ANSI 61 or sold as food-grade. Raindrip, DIG, and Toro all offer polyethylene tubing that avoids the soft, plasticky smell and chew-friendly texture of cheaper vinyl.
For dogs that dig or bite exposed lines, bury the mainline 4–6 inches deep. If you can’t bury it, run surface tubing through split-loom conduit or 1/2-inch PVC pipe. Purpose-built anti-chew kits exist, but a roll of split-loom from the hardware store usually does the same job for around $10–$15 per 25 feet.
Emitter choice matters more than people expect. Pressure-compensating drippers at 0.5, 1, or 2 GPH keep output steady on slopes and deliver water into the soil instead of spraying it into a pet’s face. That prevents puddles that encourage digging. If you need micro-sprays, choose low-flow adjustable heads and tuck them under foliage so they’re less like a water toy.
A few last pieces I rely on:
- Bitter deterrent spray: Grannick’s Bitter Apple or similar denatonium-based sprays can be applied to tubing and fittings. Reapply after rain or irrigation.
- Durable stakes: 6-inch galvanized landscape staples or heavy-duty plastic stakes keep lines tight to the ground so they’re harder to grab.
- Protective conduit: split-loom, PVC, or flexible conduit hides the most tempting surface runs.
I’d rather spend a little extra on conduit and bitter spray than repair chewed emitters every week.
📌 Frequently Asked Questions About Installing Drip Irrigation
Is drip irrigation water safe for pets to drink?
Generally yes, if the system runs on potable tap water and uses food-grade polyethylene tubing. The bigger risk is what you add to the water. Fertilizers, pesticides, or stagnant water in buried lines can cause stomach upset. Keep emitters flushed and avoid chemical injectors if your dog regularly drinks from puddles near plants.
How deep should I bury drip lines to stop my dog from digging them up?
For most diggers, bury main 1/2-inch lines 4–6 inches deep inside a shallow trench. Keep 1/4-inch emitter lines just under mulch or soil so water still reaches roots. If your dog digs obsessively, run lines through PVC conduit or hardware cloth sleeves — that stops both teeth and claws without affecting water flow.
What is the best way to stop a dog from chewing drip irrigation tubing?
Start with a non-toxic bitter spray made for pets, reapplied every few weeks. Then make the tubing physically unavailable: cover it with split wire loom, PVC pipe, or galvanized hardware cloth. Give your dog durable chew toys nearby. Avoid cayenne pepper — it can irritate eyes, nose, and paw pads, and it washes off easily.
Can I install a drip irrigation system myself, or do I need a professional?
Most small to medium yards are very DIY-friendly. You can install a basic kit in an afternoon with a timer, pressure regulator, and push-fit fittings. Call a pro if you have steep slopes, long runs over 200 feet, complex zones, or uncertain water pressure. For typical pet-safe garden beds, you’ll save hundreds doing it yourself.
How often should I run drip irrigation for a pet-safe garden?
For established shrubs and perennials, 2–3 times per week for 30–60 minutes works in most climates. Vegetables and containers may need daily short cycles in summer. Check soil moisture 3 inches down — if it’s damp, skip a cycle. Overwatering creates muddy digging spots and encourages your dog to investigate the lines.
Are there any drip irrigation components that are toxic to cats or dogs?
Reputable polyethylene tubing and plastic emitters are inert and non-toxic. The real hazards are brass fittings containing lead (choose lead-free), small emitter parts that can be swallowed, and any fertilizer or chemical injectors. Stick with food-grade or potable-water-rated components, and store spare fittings where curious pets can’t reach them.